
How to Guide - Fitting a 50's Style Pre-Wired Harness to an SG!
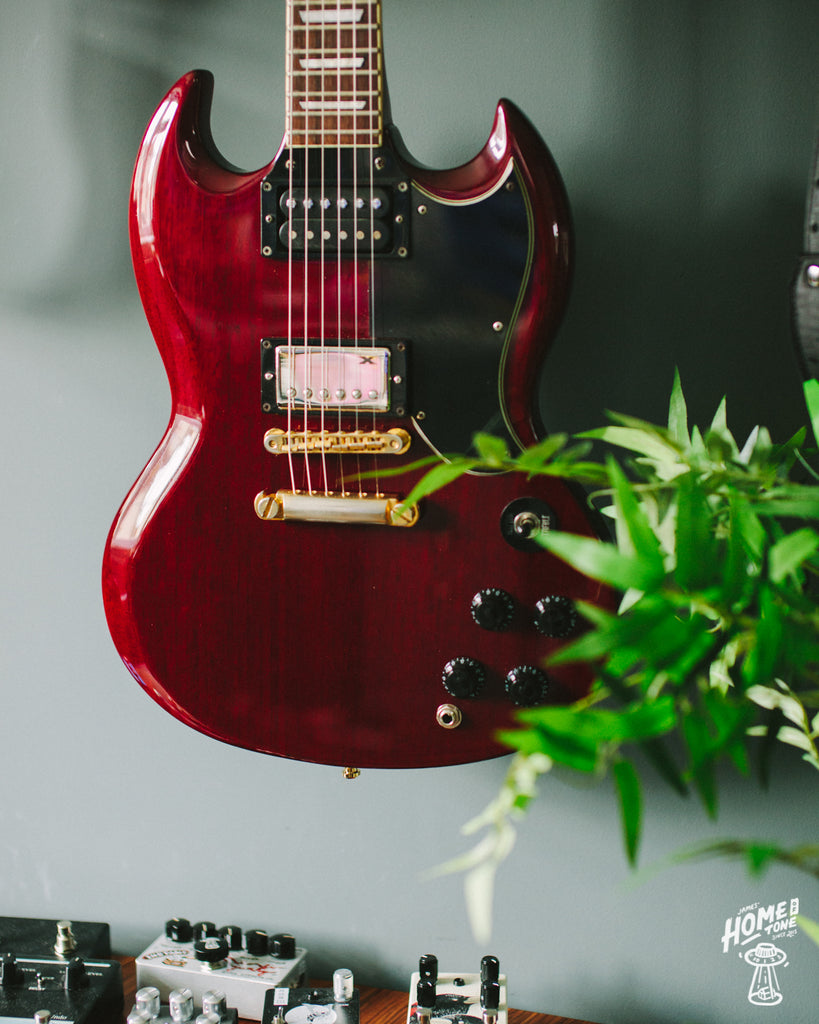
On-wards with my series of 'How to guides' showing the step-by-step process of installing one of my pre-wired guitar harnesses, this time for the iconic Gibson design, the SG. (Although this particular model is a Greco lawsuit era model, but let's not get into that too much eh!).
These models are great to work on in the sense that all of the electronics are accessible from a single control cavity, and you can even remove the pickups without taking off the strings too. So although the working space can feel a little cramped, the access to the control cavity is great and should make this a nice and simple 'how to' guide today.

Let's start by looking at what we're working on and the plan of action. Alongside the new Signature Series harness being installed, this SG is also being treated to a new pickup which the owner supplied for me, a Arcane Inc Phil X signature bridge humbucker. So first port of call is to gather the tools required for the install.
- 40w minimum Soldering iron
- Lead free solder (I personally use Rapid 22SWG Lead-free 0.7mm diameter solder)
- Cross head screwdriver
- Wire cutters
- Wire Strippers
- Small nose pliers
- 13mm socket
- Cloth or similar to protect body/paint finish
- Wiring diagram to follow, you can find all of the wiring diagrams on my website or by clicking HERE
Additional tools that could be required depending on your guitars original specs
- Step cutter and drill
- 13mm drill bit
- If replacing or adding a bridge ground wire, a length of 22AWG wire
Some far east made SG type guitars for example may have pots with a smaller shaft diameter, in those cases you may need to drill out the body to accommodate for the new CTS pots, Pure Tone Jack and Switchcraft switch. The CTS pots used in my wiring harnesses have a 9.5mm diameter threaded shaft, so you will need holes in your body that will accommodate for that. I recommend doing this with a step cutter drill bit. If at all unsure about drilling the guitar, taking the guitar to a trusted tech may be the easiest option for you too. For this particular SG, the holes for the pot and jack were already 10mm holes meaning the CTS pots will fit in comfortably, but I did need to widen the hole of the Switchcraft switch which I will highlight in the step-by-step process a little further down this article.
1) Onward with the install. Before the soldering iron is on, we'll want to strip the hardware and components no longer required from the guitar.
As mentioned previously, SGs can be great to work on as you don't really need to remove strings to carry out any of this work. So I left the strings on but slackened them to allow me to remove the bridge pickup the owner also wanted fitted. I haven't shown that stage but I'm sure you won't mind me not showing photos of slackening strings!
With the hardware removal, this is a simple task of grabbing your cross head screwdriver and removing the back control cavity cover small mounting screws to access the electronics. As well as removing the control knobs too.

Much to my surprise, despite the guitar having smaller 'mini' sized pots, the shaft diameter and also spline diameter for the control knobs was actually the same as the CTS replacement going in. So on this occasion, I won't need to fit new US spec control knobs or drill out the body to suit the 9.5mm shaft diameter CTS pots. But however, the pickup selector switch was a slightly different diameter to the US spec Switchcraft version so I'll touch on that shortly. Other than that, this was a nice and easy step with no nasty surprises.

Helpful tip, have a small tub to hand so when you remove any screws etc you can keep them safely stored until required again.
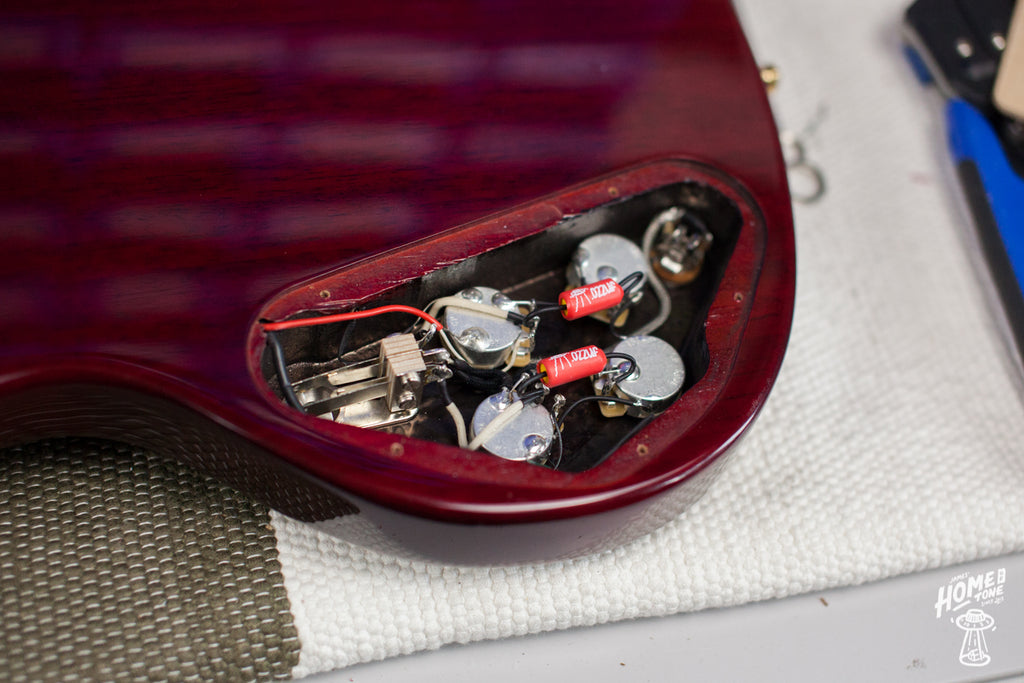
2) We can now lift out the harness complete, and this is the first chance to see what original components we're working with. This far east built Greco SG has the typical components you expect to see on far eastern made guitars such as an encloses un branded switch, mini pots, a fair flimsy jack socket and thin gauge wire. It will be nice to tidy that up a little in the process of the new install.

Here you'll want to identify your pickup wires and bridge ground wire. Those are the wires I'll remove from the original harness first, so I just simply snip those wires close to their connection ready to prepare for re-wiring to the new harness. The bridge ground wire on this guitar had a beige shielding sleeve over it and came from a separate hole to the pickup wires so that was easy to identify. The pickup wires were colour coded with a red outer shield for the neck pickup (which was being kept for the guitar) and the bridge pickup colour coded with a green outer shield.

I removed those wires from the harness and lifted out those original components.
3) Although not all of you will be changing pickups when changing the harness, but seeing as this guitar is being treated to a new bridge pickup I thought I'd show that process to in case it is of some further help. I simply unscrewed the four corner pickup mounting ring screws, loosened the strings and pulled the pickup out of the guitar.


With the old pickup removed, and un-mounted from the pickup mounting ring. I installed the new pickup to the ring, and began to feed the wire through the body cavity as shown below.


Then mount up the pickup to the body to carry on with the harness install. I'll show how to solder the pickup wires shortly.
4) This step is showing the only real hurdle to get over during this install for me. The original pickup selector switch had a different diameter and mount through the body than the new Switchcraft switch. Hopefully you can see the differences in the photo below. Also worth noting the body top thickness on this particular guitar, which is actually fairly thick compared to a USA built Gibson I have found. This is something I had to address when mounting the new switch. As Gibson SG control cavities are quite shallow, you have to be selective of what switch to use and the most commonly used variation is the 'right angle' Switchcraft item. This fits the cavity perfectly, but the downside is the very shallow thread depth for mounting. Due to this, you might have noticed the additional extended knurled nut I supply with all SG harnesses.

The extended knurled nut has a diameter of 12.75mm, so slightly larger than the usual 12mm switch nut. So first of all the switch mounting hole needs widening to suit the 12.75mm extended nut, and to help protect the finish I recommend doing this with a step cutter drill but and follow afterwards with a straight standard drill bit to finish the mounting hole.

Mask up the hole bring drilled to help protect the guitar's finish.

Then with your step cutter drill bit, drill to the required diameter. On this occasion, 13mm to suit the 12.75mm extended nut.

And finish the hole with a standard drill bit, to give it straight edges. Test the fit of the extended nut by placing it in the hole as above, it should sit in there comfortably!
This process is essentially the same if you need to widen the holes for the pots too depending on the guitar's original specs. So if your SG had mini sized pots with a smaller shaft diameter, then chances are you'll need to carry out the above process with 10mm drill bits to accomodate the 9.5mm shaft diameter CTS pots. Hopefully this example of the process helps with that also. As always, check your measurements twice & protect the finish then hopefully you'll have a trouble free task at hand. But if you're at all not confident in doing this yourself, support your local guitar tech and take it to them to do professionally.
5) No onto the soldering! To make life a bit easier, and to help reduce the risk of damaging the guitar body, I tend to leave my new harness on the mounting/shipping board and make all of my solder connections as shown below. Working within a guitar control cavity can sometimes be a bit cramped, and I've seen so many guitars over the years with soldering iron burn marks around a cavity, that to me, doing it like this feels like a no brainer. It's a lot easier and takes away the risk of damaging the guitar finish.

I'm going to start my soldering with the neck pickup wires. But first I need to prepare the wires, so with my wire strippers (due to these being plastic coated) I strip back a portion of the 'hot' wire and strip back some of the outer sleeve to reveal the outer braided ground wire too.

Pickups can be wired in a wide variety of ways, 2 conductor or 4 conductor, traditional cloth covered wire or plastic coated like the neck pickup on this guitar and in a variety of 'colour codes'. The best thing to do with identifying these is either making a note of any colour codes before removing the pickup from the wiring during an install, or if they are brand new pickups simply consult the pickup manufacturer information.

This is our first solder joint, so refer to your wiring diagram relevant to your harness/guitar type and connect the pickup 'hot' wire to the correct lug on the pot, and your ground wire to the back of the pot casing. If you are working with lead free solder, and you perhaps haven't prior, then I recommend having a few practice runs first as lead free solder is a bit more difficult to work with due to it's higher melting temperature.
6) Whilst working on that neck position volume pot, I figured I'd attach the bridge ground wire there too. You can attach the bridge ground wire to the back of any pot really, but the most common place is whichever pot it is closest to, which on this model is the neck volume pot.

7) Next up, the bridge pickup! This is the brand new Arcane Inc Phil X signature humbucker, and is wired with 4 conductor wires meaning inside the outer plastic shielding you'll find 4 wires and a bare ground. This is a fairly common sight, and can allow you to do some more unique switching options like coil splitting for example. As this is a standard 50s style wiring install, we'll need to find out which colour wire does what, before installing. Now unfortunately the pickup didn't come with any info on this, nor did the Arcane website oddly. But a quick google search and I soon found the answer courtesy of Mr Arcane himself on a guitar forum.
So I set about stripping down the wires ready to prepare them for soldering.

We're greeted with green, red, white, black and 'bare' wires. Firstly I want to know which is my main 'hot' output wire, which on this particular colour coding was the black wire. I then wanted to know which is the ground, usually you expect the bare wire to be ground which it is of course, but you usually have an additional ground with 4 conductor wiring and on this ocassion it was the green wire. Leaving me with the red and white wire left over, these get soldered and taped together for this standard 50s style install so I get to work on that little bit of prep!

With that done I'm ready to get it soldered to the harness!

8) Referring back to your harness wiring diagram, simply solder your 'hot' pickup wire to the correct bridge volume pot lug, and the ground wire(s) to the back of the pot casing. Those two wires we soldered together and taped up, those on this occasion get left as they are and tucked away when we mount the harness into the body.

9) So! That's all the soldering finished up! At this stage, I tend to quickly plug the guitar in and check it all functions as it should, no buzzing etc. If all good, then you can get it mounted up, but if there is an issue, it saves and time spent installing only to dismantle again. So a quick plug in and function test is worth doing at this stage.
But if all good, then you are ready to get it mounted into the guitar. I remove the harness from the mounting board, and begin mounting the components into the cavity. Handle the components nice and carefully, and tighten up with your socket.

10) Before you re-fit the back cover plate, check everything over and enjoy your work! It's also handy to leave the back cover plate until last, as you might find it useful to support the pot casings whilst pushing on your control knobs. Tuck any wires away if needed too and make sure nothing will stop the cover sitting correctly. The SG cavity is pretty shallow so it's easy to have wires etc poking up causing the cavity cover to not sit back in the route correctly. Pop the cover back on and attach the mounting screws.

Onto the control knobs! This might seem like such a simple task, but it's really important if you don't want to seriously damage the new pots you've just installed. If the pot shafts aren't correctly adjusted and you force on the control knob, it can push the back of the pot casing off and as good as destroy the pot. So spend time adjusting the pot shaft by pinching it together using pliers until it is a comfortable but not too tight fit for the control knob. If it feels like you're forcing them on, it's too tight, so stop, adjust again and try to fit.
11) There we have it! Harness installed, hardware back on and ready to hear it at it's best! This particular one is an absolute monster now too with that Phil X pickup! But I must say, I expected that to sound good, but to hear the neck pickup breathe properly thanks to the quality wiring components now in the guitar, that was the real joy and sounded great I thought!
Thanks again for choosing one of my wiring harness for your SG, and I hope this article helps your install go as smoothly as possible!
You can find the range of 'Signature Series' wiring harnesses on the shop by clicking HERE
You can find the range of wiring diagrams and info guides to follow during the install by clicking HERE
James
These models are great to work on in the sense that all of the electronics are accessible from a single control cavity, and you can even remove the pickups without taking off the strings too. So although the working space can feel a little cramped, the access to the control cavity is great and should make this a nice and simple 'how to' guide today.

Let's start by looking at what we're working on and the plan of action. Alongside the new Signature Series harness being installed, this SG is also being treated to a new pickup which the owner supplied for me, a Arcane Inc Phil X signature bridge humbucker. So first port of call is to gather the tools required for the install.
- 40w minimum Soldering iron
- Lead free solder (I personally use Rapid 22SWG Lead-free 0.7mm diameter solder)
- Cross head screwdriver
- Wire cutters
- Wire Strippers
- Small nose pliers
- 13mm socket
- Cloth or similar to protect body/paint finish
- Wiring diagram to follow, you can find all of the wiring diagrams on my website or by clicking HERE
Additional tools that could be required depending on your guitars original specs
- Step cutter and drill
- 13mm drill bit
- If replacing or adding a bridge ground wire, a length of 22AWG wire
Some far east made SG type guitars for example may have pots with a smaller shaft diameter, in those cases you may need to drill out the body to accommodate for the new CTS pots, Pure Tone Jack and Switchcraft switch. The CTS pots used in my wiring harnesses have a 9.5mm diameter threaded shaft, so you will need holes in your body that will accommodate for that. I recommend doing this with a step cutter drill bit. If at all unsure about drilling the guitar, taking the guitar to a trusted tech may be the easiest option for you too. For this particular SG, the holes for the pot and jack were already 10mm holes meaning the CTS pots will fit in comfortably, but I did need to widen the hole of the Switchcraft switch which I will highlight in the step-by-step process a little further down this article.
1) Onward with the install. Before the soldering iron is on, we'll want to strip the hardware and components no longer required from the guitar.
As mentioned previously, SGs can be great to work on as you don't really need to remove strings to carry out any of this work. So I left the strings on but slackened them to allow me to remove the bridge pickup the owner also wanted fitted. I haven't shown that stage but I'm sure you won't mind me not showing photos of slackening strings!
With the hardware removal, this is a simple task of grabbing your cross head screwdriver and removing the back control cavity cover small mounting screws to access the electronics. As well as removing the control knobs too.

Much to my surprise, despite the guitar having smaller 'mini' sized pots, the shaft diameter and also spline diameter for the control knobs was actually the same as the CTS replacement going in. So on this occasion, I won't need to fit new US spec control knobs or drill out the body to suit the 9.5mm shaft diameter CTS pots. But however, the pickup selector switch was a slightly different diameter to the US spec Switchcraft version so I'll touch on that shortly. Other than that, this was a nice and easy step with no nasty surprises.

Helpful tip, have a small tub to hand so when you remove any screws etc you can keep them safely stored until required again.
2) We can now lift out the harness complete, and this is the first chance to see what original components we're working with. This far east built Greco SG has the typical components you expect to see on far eastern made guitars such as an encloses un branded switch, mini pots, a fair flimsy jack socket and thin gauge wire. It will be nice to tidy that up a little in the process of the new install.

Here you'll want to identify your pickup wires and bridge ground wire. Those are the wires I'll remove from the original harness first, so I just simply snip those wires close to their connection ready to prepare for re-wiring to the new harness. The bridge ground wire on this guitar had a beige shielding sleeve over it and came from a separate hole to the pickup wires so that was easy to identify. The pickup wires were colour coded with a red outer shield for the neck pickup (which was being kept for the guitar) and the bridge pickup colour coded with a green outer shield.

I removed those wires from the harness and lifted out those original components.
3) Although not all of you will be changing pickups when changing the harness, but seeing as this guitar is being treated to a new bridge pickup I thought I'd show that process to in case it is of some further help. I simply unscrewed the four corner pickup mounting ring screws, loosened the strings and pulled the pickup out of the guitar.


With the old pickup removed, and un-mounted from the pickup mounting ring. I installed the new pickup to the ring, and began to feed the wire through the body cavity as shown below.


Then mount up the pickup to the body to carry on with the harness install. I'll show how to solder the pickup wires shortly.
4) This step is showing the only real hurdle to get over during this install for me. The original pickup selector switch had a different diameter and mount through the body than the new Switchcraft switch. Hopefully you can see the differences in the photo below. Also worth noting the body top thickness on this particular guitar, which is actually fairly thick compared to a USA built Gibson I have found. This is something I had to address when mounting the new switch. As Gibson SG control cavities are quite shallow, you have to be selective of what switch to use and the most commonly used variation is the 'right angle' Switchcraft item. This fits the cavity perfectly, but the downside is the very shallow thread depth for mounting. Due to this, you might have noticed the additional extended knurled nut I supply with all SG harnesses.

The extended knurled nut has a diameter of 12.75mm, so slightly larger than the usual 12mm switch nut. So first of all the switch mounting hole needs widening to suit the 12.75mm extended nut, and to help protect the finish I recommend doing this with a step cutter drill but and follow afterwards with a straight standard drill bit to finish the mounting hole.

Mask up the hole bring drilled to help protect the guitar's finish.

Then with your step cutter drill bit, drill to the required diameter. On this occasion, 13mm to suit the 12.75mm extended nut.

And finish the hole with a standard drill bit, to give it straight edges. Test the fit of the extended nut by placing it in the hole as above, it should sit in there comfortably!
This process is essentially the same if you need to widen the holes for the pots too depending on the guitar's original specs. So if your SG had mini sized pots with a smaller shaft diameter, then chances are you'll need to carry out the above process with 10mm drill bits to accomodate the 9.5mm shaft diameter CTS pots. Hopefully this example of the process helps with that also. As always, check your measurements twice & protect the finish then hopefully you'll have a trouble free task at hand. But if you're at all not confident in doing this yourself, support your local guitar tech and take it to them to do professionally.
5) No onto the soldering! To make life a bit easier, and to help reduce the risk of damaging the guitar body, I tend to leave my new harness on the mounting/shipping board and make all of my solder connections as shown below. Working within a guitar control cavity can sometimes be a bit cramped, and I've seen so many guitars over the years with soldering iron burn marks around a cavity, that to me, doing it like this feels like a no brainer. It's a lot easier and takes away the risk of damaging the guitar finish.

I'm going to start my soldering with the neck pickup wires. But first I need to prepare the wires, so with my wire strippers (due to these being plastic coated) I strip back a portion of the 'hot' wire and strip back some of the outer sleeve to reveal the outer braided ground wire too.

Pickups can be wired in a wide variety of ways, 2 conductor or 4 conductor, traditional cloth covered wire or plastic coated like the neck pickup on this guitar and in a variety of 'colour codes'. The best thing to do with identifying these is either making a note of any colour codes before removing the pickup from the wiring during an install, or if they are brand new pickups simply consult the pickup manufacturer information.

This is our first solder joint, so refer to your wiring diagram relevant to your harness/guitar type and connect the pickup 'hot' wire to the correct lug on the pot, and your ground wire to the back of the pot casing. If you are working with lead free solder, and you perhaps haven't prior, then I recommend having a few practice runs first as lead free solder is a bit more difficult to work with due to it's higher melting temperature.
6) Whilst working on that neck position volume pot, I figured I'd attach the bridge ground wire there too. You can attach the bridge ground wire to the back of any pot really, but the most common place is whichever pot it is closest to, which on this model is the neck volume pot.

7) Next up, the bridge pickup! This is the brand new Arcane Inc Phil X signature humbucker, and is wired with 4 conductor wires meaning inside the outer plastic shielding you'll find 4 wires and a bare ground. This is a fairly common sight, and can allow you to do some more unique switching options like coil splitting for example. As this is a standard 50s style wiring install, we'll need to find out which colour wire does what, before installing. Now unfortunately the pickup didn't come with any info on this, nor did the Arcane website oddly. But a quick google search and I soon found the answer courtesy of Mr Arcane himself on a guitar forum.
So I set about stripping down the wires ready to prepare them for soldering.

We're greeted with green, red, white, black and 'bare' wires. Firstly I want to know which is my main 'hot' output wire, which on this particular colour coding was the black wire. I then wanted to know which is the ground, usually you expect the bare wire to be ground which it is of course, but you usually have an additional ground with 4 conductor wiring and on this ocassion it was the green wire. Leaving me with the red and white wire left over, these get soldered and taped together for this standard 50s style install so I get to work on that little bit of prep!

With that done I'm ready to get it soldered to the harness!

8) Referring back to your harness wiring diagram, simply solder your 'hot' pickup wire to the correct bridge volume pot lug, and the ground wire(s) to the back of the pot casing. Those two wires we soldered together and taped up, those on this occasion get left as they are and tucked away when we mount the harness into the body.

9) So! That's all the soldering finished up! At this stage, I tend to quickly plug the guitar in and check it all functions as it should, no buzzing etc. If all good, then you can get it mounted up, but if there is an issue, it saves and time spent installing only to dismantle again. So a quick plug in and function test is worth doing at this stage.
But if all good, then you are ready to get it mounted into the guitar. I remove the harness from the mounting board, and begin mounting the components into the cavity. Handle the components nice and carefully, and tighten up with your socket.


10) Before you re-fit the back cover plate, check everything over and enjoy your work! It's also handy to leave the back cover plate until last, as you might find it useful to support the pot casings whilst pushing on your control knobs. Tuck any wires away if needed too and make sure nothing will stop the cover sitting correctly. The SG cavity is pretty shallow so it's easy to have wires etc poking up causing the cavity cover to not sit back in the route correctly. Pop the cover back on and attach the mounting screws.

Onto the control knobs! This might seem like such a simple task, but it's really important if you don't want to seriously damage the new pots you've just installed. If the pot shafts aren't correctly adjusted and you force on the control knob, it can push the back of the pot casing off and as good as destroy the pot. So spend time adjusting the pot shaft by pinching it together using pliers until it is a comfortable but not too tight fit for the control knob. If it feels like you're forcing them on, it's too tight, so stop, adjust again and try to fit.
11) There we have it! Harness installed, hardware back on and ready to hear it at it's best! This particular one is an absolute monster now too with that Phil X pickup! But I must say, I expected that to sound good, but to hear the neck pickup breathe properly thanks to the quality wiring components now in the guitar, that was the real joy and sounded great I thought!

Thanks again for choosing one of my wiring harness for your SG, and I hope this article helps your install go as smoothly as possible!
You can find the range of 'Signature Series' wiring harnesses on the shop by clicking HERE
You can find the range of wiring diagrams and info guides to follow during the install by clicking HERE
James